
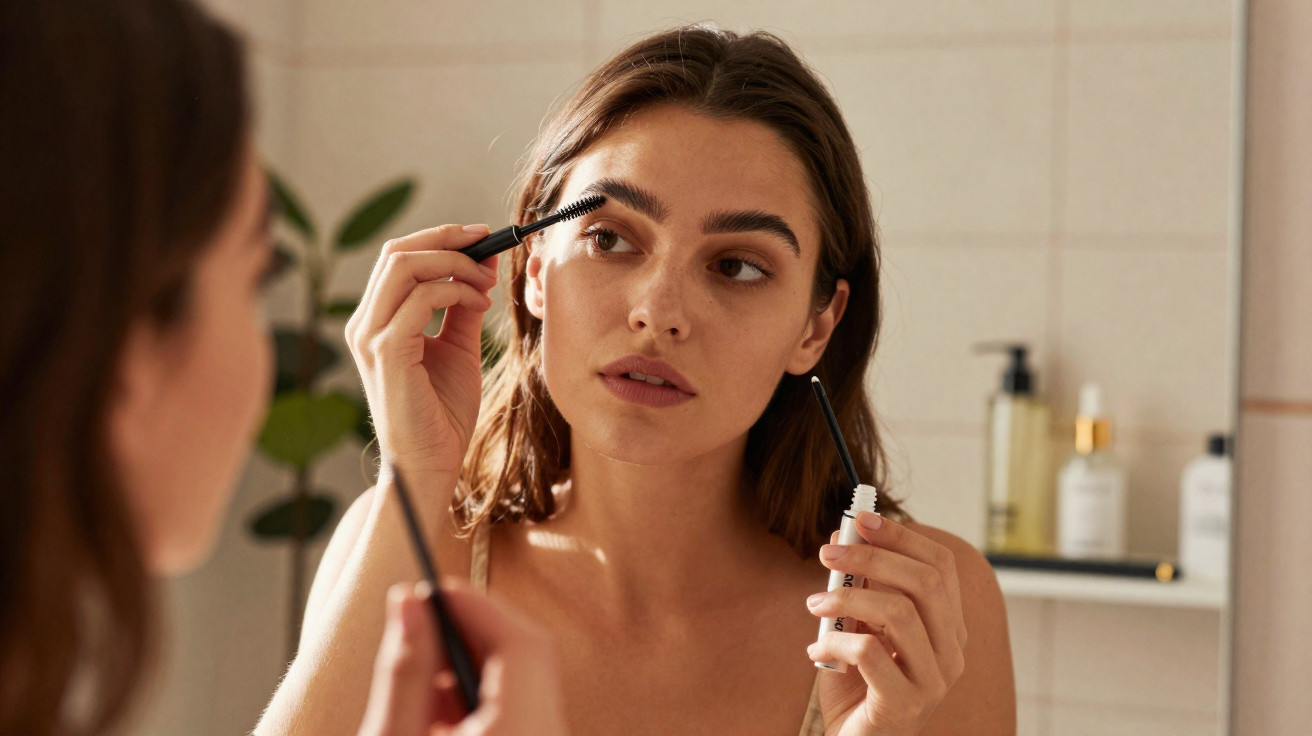
With a few targeted tweaks, you can make your brows look visibly fuller again.
Thin, faded or patchy eyebrows can quickly make a face appear harsher and more tired. If you’re not keen on microblading or other in-studio treatments, there’s plenty you can do at home to strengthen the hairs and make the brow line look denser. Four simple steps are enough, as long as you build them in consistently - ideally starting tonight.
Why narrow eyebrows can make you look older
Eyebrows frame the face and naturally draw attention to the eyes. If they’re plucked very thin or lightened heavily, that balance shifts. The forehead appears larger, the eyes look smaller, and expression lines stand out more. Gaps in the brow line can be caused by:
- years of over-plucking with tweezers or wax
- chemical treatments such as tinting or bleaching
- dry, irritated skin around the brow area
- natural hormonal changes and the ageing process
The good news is that many hair follicles are simply “asleep” and can be encouraged back into activity with patience and care. Some damage may be permanent, but with four clear steps the line can look noticeably fuller - even if not every hair returns.
"Full brows are less down to luck than many people think - it’s mainly about routine."
Step 1: A plucking break - your brows need time to grow
The most important step may feel inconvenient, but it’s non-negotiable: a proper break from plucking. For at least six to eight weeks, don’t do any shape corrections along the actual brow line.
How to get through the “wild” phase
During this period, regrowth can look a bit chaotic. To stay comfortable with the in-between stage, a few practical tricks help:
- Only remove hairs that are clearly outside the natural line - for example, high up on the forehead or very low on the eyelid.
- Use a clear brow gel, or a tiny amount of hairspray on a spoolie, to keep hairs lying neatly and make the edge look tidier.
- Apply concealer along the lower edge of the brow: it visually disguises bothersome stubble.
If you “just quickly” pluck a couple of hairs every other day, you block the density you’ll want later. Follicles need quiet time to recover and grow back stronger.
Step 2: Daily brushing - a mini massage for more fullness
A small tool makes a big difference: the brow brush, also known as a spoolie. Brushing every day works like a micro-massage.
The right way to brush
- With a clean spoolie, comb all hairs upwards first. This instantly opens up the eye area.
- Then lightly sweep the tips outwards, following the natural growth direction.
- Go over each brow two to three times, without scrubbing.
That gentle friction boosts blood circulation in the skin, helping nutrients reach the roots more easily. It also reveals where the real gaps are - and often you’ll find the “disaster” is smaller than it first looked.
"People who brush their brows daily often see noticeably more structure after just a few days - without any make-up."
Step 3: A care booster - what brow serums really do
The right care can turn fine hairs into stronger, more flexible brows. Products containing peptides, plant oils or keratin-like building blocks help stabilise the hair shaft and support the natural growth phase.
Suitable ingredients at a glance
| Ingredient | Effect on the brows |
|---|---|
| Peptides | Can stimulate the hair root and extend the growth phase |
| Castor oil | Deeply nourishes, makes hairs supple and look fuller |
| Panthenol | Calms the skin and strengthens the natural barrier |
| Plant oils (jojoba, argan) | Protect against dryness and add shine |
Correct evening application
Always apply serum or oil to clean, dry skin. One to two drops is enough:
- Use the applicator or your fingertip to spread a thin layer along the brow line.
- Massage in with circular motions for around 30 seconds per side.
- Leave on overnight; in the morning, rinse off with water only.
Allow several weeks before expecting a clear difference. If you suddenly notice more fine fluff above the brow, it usually settles on its own once you adjust the dose or switch to applying every other evening.
Step 4: “Hair-by-hair” make-up - brows that look fuller immediately
While the plucking break and care routine do their work in the background, make-up provides an instant boost. The key is to avoid a solid block of colour and instead create fine strokes that mimic individual hairs.
How to achieve a natural finish
- Choose a shade that’s no more than one tone darker than your natural brow colour.
- Using a very fine pencil or felt-tip liner, draw short, slightly curved strokes in the direction of growth - especially where gaps show.
- Finish with a lightly tinted brow gel to set the hairs and add extra volume.
"Instead of colouring in the brow, think in individual hairs - the result stays subtle but clear."
If you like experimenting, you can also try dedicated soap or wax products that brush hairs strongly upwards. This visually increases the brow area and makes brows look denser straight away, even when there isn’t much hair yet.
Which brow shape actually suits your face
Before you move on to fine-tuning, it’s worth doing a quick mirror check. The best shape isn’t dictated by trends - it depends on your face shape, forehead height and how close-set your eyes are.
- Round face: A gently rising, subtle curve creates a lengthening effect.
- Square face shape: A softer, less angular arch reduces harshness.
- Narrow face: Slightly wider brows with a straighter line add balance.
- Very close-set eyes: Don’t extend the inner edge too far inwards, otherwise the eyes can appear even closer together.
A professional brow styling appointment can be useful as a starting point. The base shape found there is easier to maintain at home with less plucking, as long as you follow your natural hair growth direction.
Risks, limits, and when you should see a dermatologist
If you’ve plucked the same area daily for many years, some follicles may be permanently damaged. In those spots, very little regrowth happens - even with expensive serums. If:
- nothing changes at all within six months despite consistent care,
- you develop pronounced redness, itching or flaking at the brow base,
- you suddenly lose hair in several areas of the body,
you should see a dermatologist. Sometimes very thin brows are linked to a thyroid disorder or an autoimmune condition. When caught early, these causes are often treatable - and your brows can benefit too.
How to maintain your new fullness long-term
Once your brows finally look denser, the real skill begins: keeping a healthy balance between shaping and protecting the hairs.
- Pluck no more than every three to four weeks - never daily.
- Before plucking, brush the brows and mark the desired outline with a kohl pencil - anything outside can go, anything inside stays.
- Keep using your care product even when the goal seems reached, just possibly less often.
If you wear make-up, remove it thoroughly in the evening - but gently. Aggressive rubbing with cotton pads can pull out hairs and irritate the skin. An oil-based cleanser dissolves pigment quickly without tugging at the brow line.
With this combination of a plucking break, a brushing routine, targeted care and a smart make-up technique, you’ll create the foundation for brows that frame your face rather than overpower it - and that look as full as you want them to be.



Comments
No comments yet. Be the first to comment!
Leave a Comment